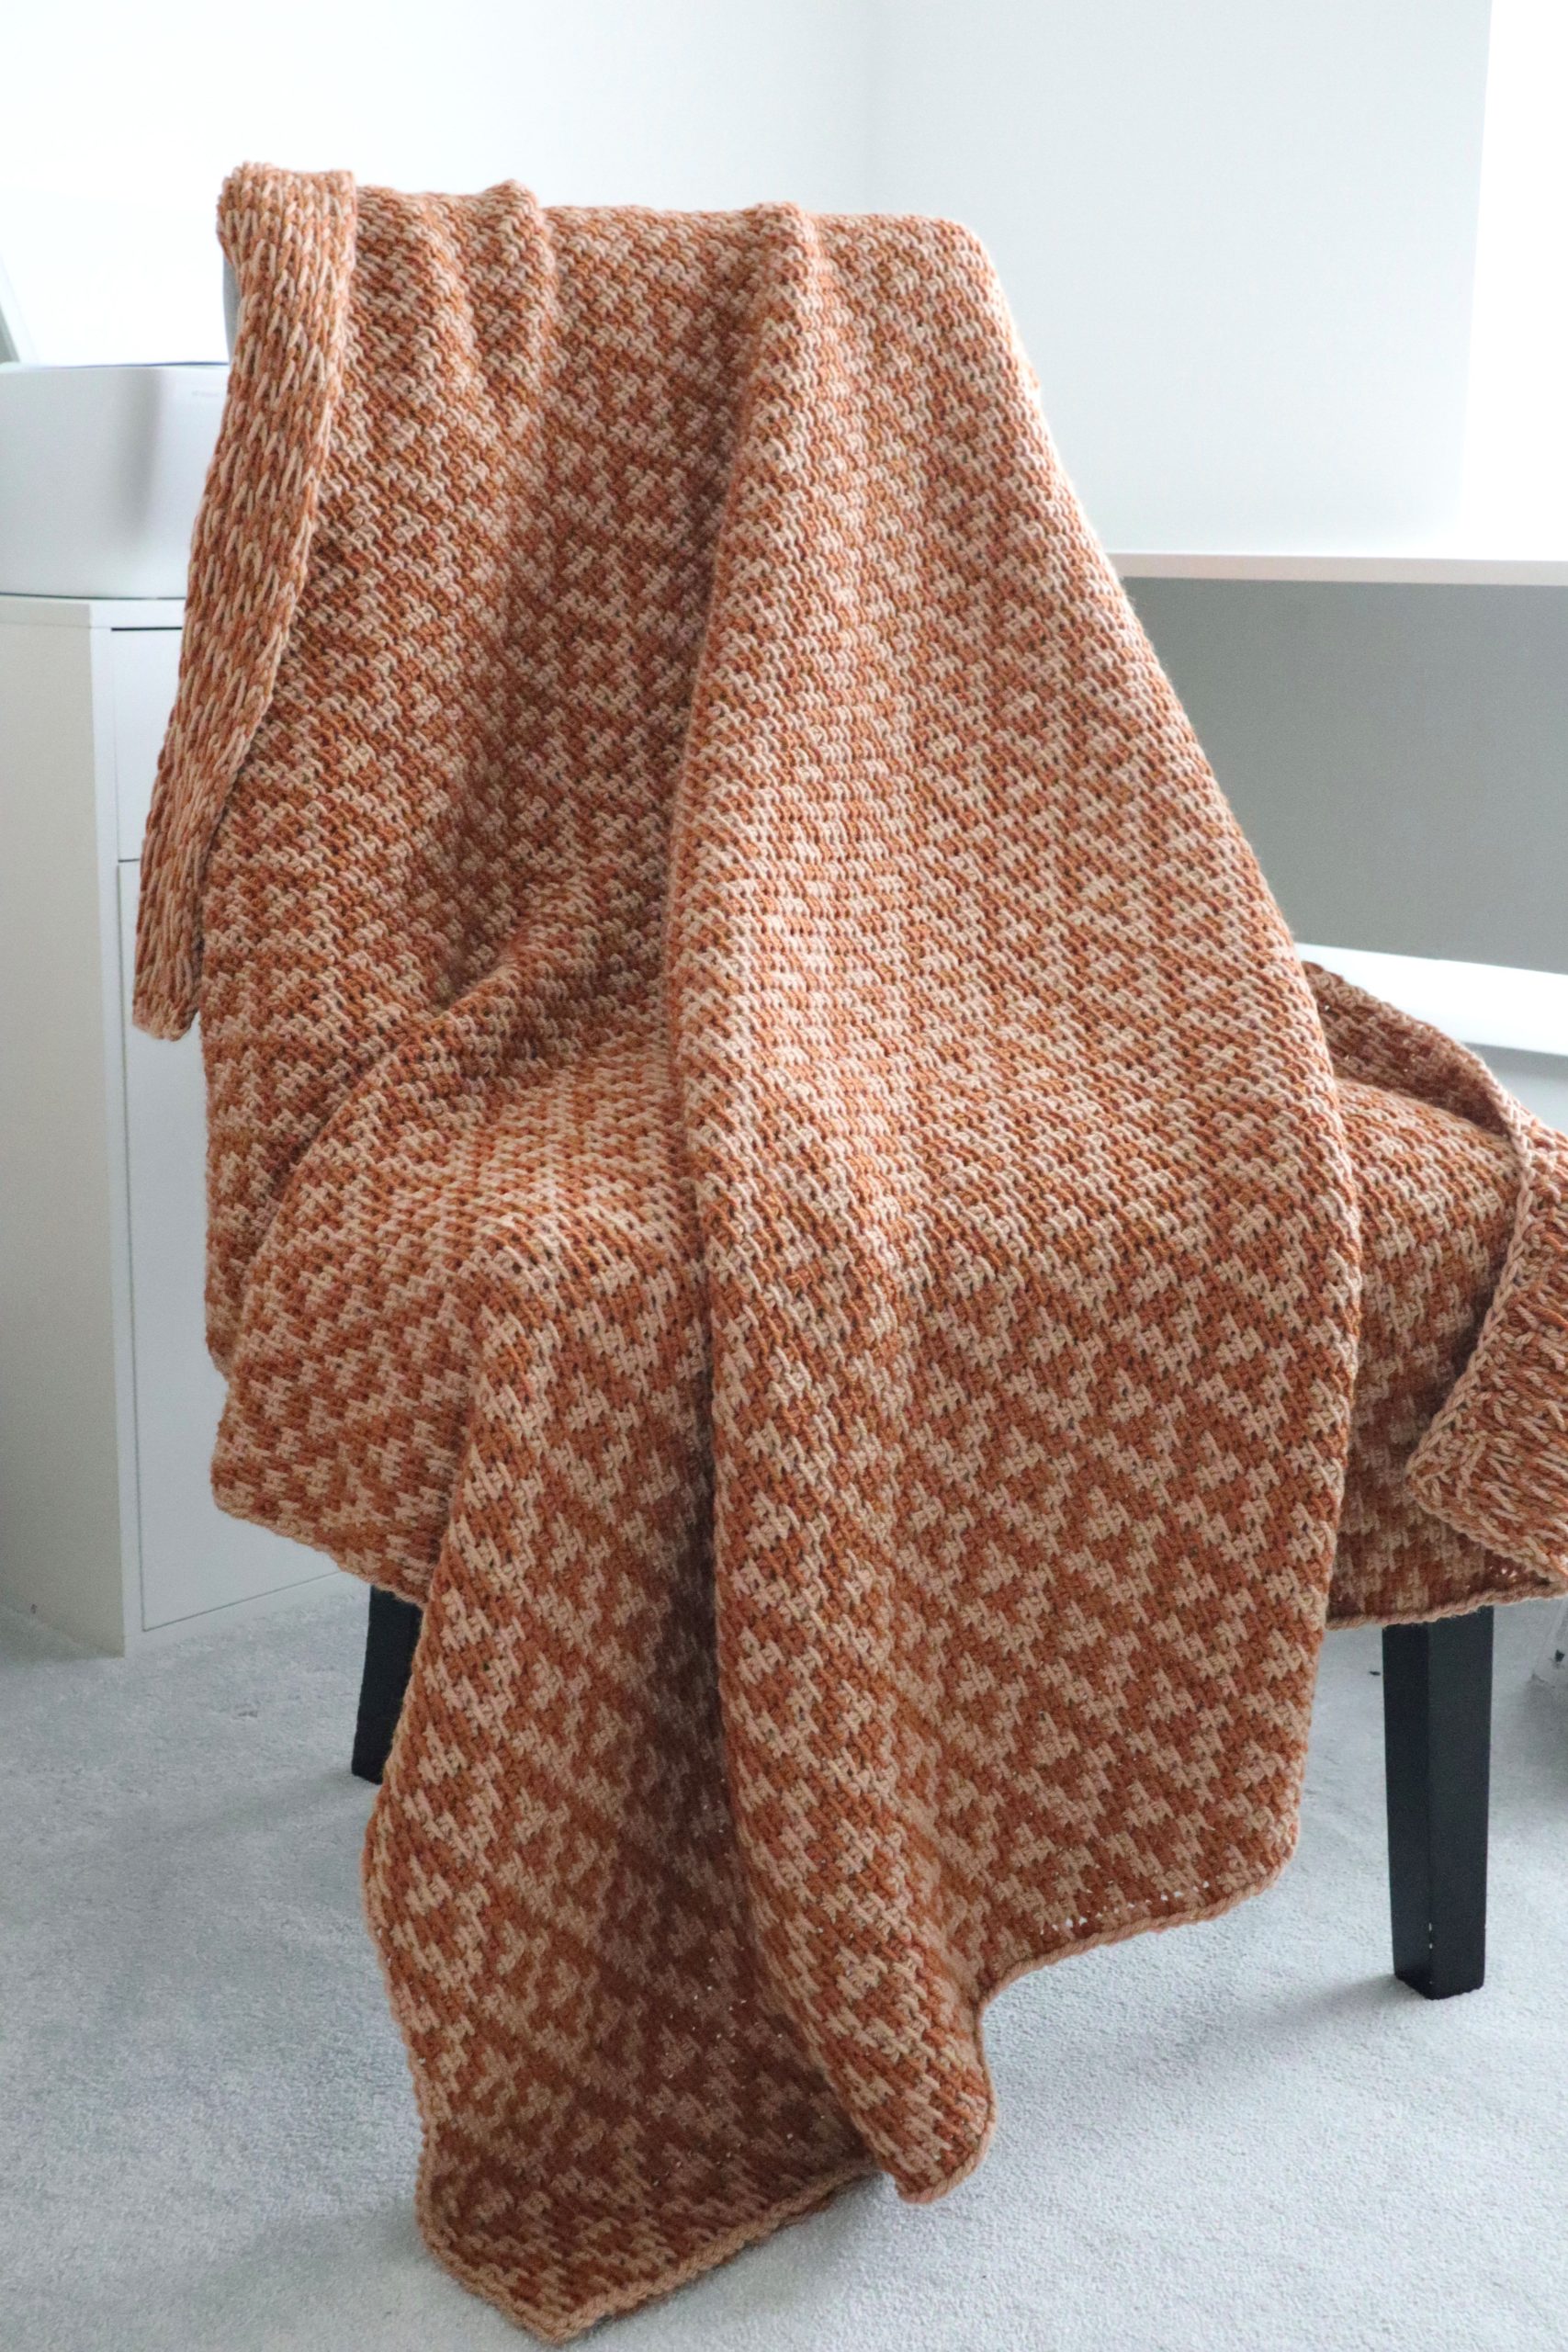
The Melissa Throw is a great Tunisian crochet throw project to take your Tunisian crochet colourwork skills up a notch! This is a large project that allows you to master changing colours whilst keeping your gauge even, resulting in an amazingly looking piece of home décor that is to be cherished for years to come.
Last modified:
You can purchase the add free PDF version of the pattern at LoveCrafts here:

and Ravelry here:

This site contains affiliate links to products. We may receive a commission for purchases made through these links at no extra cost to you. This helps to cover the running cost of the website and enables me to continue making free patterns.
Please NOTE that this pattern is subject to copyright and is my intellectual property. The online version is for personal use only. Do not re-publish or sell this pattern in part or full or make video tutorials of it. Any such actions are a breach of copyright and can result in legal action.

Skills required:
To create this beautiful Tunisian crochet throw you will need to master (or already know) these stitches and techniques:
Chain, Tunisian crochet technique (alternating forward and return passes), Tunisian simple stitch (tss), Tunisian crochet colourwork, Tunisian simple stitch bind-off, blocking.
Skill level:

Finished measurements:
The final Tunisian crochet throw measurements (blocked):
105.5 cm x 140 cm (approx. 41.5” x 55”)
Materials and tools
To get the exact look as on the pictures of my Tunisian crochet throw, you will need:
We Crochet Brava (100% Acrylic | Worsted weight | 100 g (3.5 oz) = 199 m (218 yds)), (#) Almond 5 skeins (A), (#) Gingerbread 5 skeins (B)

Tunisian crochet hook size 7.0 mm with cable (at least 79 cm (31”)) or size to obtain the gauge
Tapestry needle
Scissors
I found acrylic yarns to be the best option for blanket and throw projects.
Firstly, acrylic yarn is very affordable and often available in a rich colour palette. If you decide the use Brava Worsted as per my sample, you will be spoilt for choice by the wide range of colours this yarn comes in.
Secondly, acrylic blankets and throws are easily maintained, you can throw it into the washing machine without holding your breath. Although I do love natural fibers and use them often, I had a few pieces completely destroyed due to accidental washing in the washing machine. And I don’t like to take chances!
Thirdly, I can’t bear my projects pilling and I am yet to find one of my acrylic projects to do that.
Fourthly, blankets and throws get lots of wear and tear, I can only think of times my kids fought over a blanket pulling it back and forth. Some tassels may have been harmed in the process! And if this would have been a project I spent fortune on fancy yarn, I may have cried big crocodile tears.
So yes, I do advise to use acrylic yarn for blankets and throws.
You can get your Brava Worsted here.
You can get your craft supplies here.

Gauge:
Blocked Gauge:
14 sts x 9 rows = 10 x 10 cm (4 x 4”) over tss
Gauge helps you to understand how the project turns out in terms of the final size. If you would like to achieve the exact size of the final project as in the instructions above, you gauge needs to match exactly to the above.
If you get more stitches and/or rows than stated above using the exact hook size as per instructions, your final project will turn out smaller. Conversely, if you get less stitches and/or rows than stated above using the exact hooks size as per instructions, your final project will turn out bigger.
To make adjustments, if you get more stitches and/or rows, you can try using bigger hook size to get closer to the desired size. Conversely, if you get less stitches and/or rows, you can try using smaller hook size to get closer to the desired size.
It may take trial and error to try out a few hook sizes to achieve the exact size.
Alternatively, if you really don’t want to make several samples to achieve the desired size, you can try to alter your tension as you work the project. However, I would advise to try this out once you master the basics of Tunisian crochet as it may be a bit tiresome to try to master the basics of Tunisian crochet and focus on alternating your tension while working the project.

Stitch guide:
Tunisian crochet stitches are worked in 2 steps; forward and return pass from right to left, with the number of sts (lps) increasing on the hook during the forward pass and decreasing during the return pass.
Standard Return pass is worked in the same way for all stitches (rows of sts) used in this project as follows : 1 ch, * yrh, draw through 2 lps on hook, rep from * until 1 lp on hook.
Edge stitches:
Right edge stitch- This is the first lp on hook and counts as first st unless otherwise stated.
Left edge stitch- This st is referred to in the pattern as the End Stitch (ES) and is crocheted as follows: Rotate the end of the fabric towards yourself, insert the hook under both bars (left and right) of the last st, yrh and pul.
- First row of Tunisian crochet: Insert the hook in the back bump of second ch from hook, yrh and pul across.
- Tunisian simple stitch: Insert the hook from right to left under front vertical bar of the next st, yrh and pul.
Changing colours as you go: When changing the colours within a row in Tunisian crochet, place the new strand of yarn over the old strand. This locks the old colour in place and prevent gaps occurring between the different colour sections.
Tunisian Simple stitch bind-off: Insert hook from right to left under front vertical bar of the next st, yrh, pul and pull through the lp that is on the hook. One lp remains on the hook.
If this is your first Tunisian crochet project and are not sure if this blanket matches your skills, I have a Tunisian crochet masterclass tutorial that will jump-start your Tunisian crochet journey!
| Abbreviations: | |
| ch- chain | yrh- yarn round the hook |
| st(s)- stitch(es) | pul- pull up a loop |
| lp(s)- loop(s) | FP- forward pass |
| tss- Tunisian simple stitch | RP- return pass |
| RS- right side | approx.- approximately |
| ES- End stitch | rep- repeat |

Stitch chart:

Notes:
- Similar worsted weight yarns may be substituted; please check gauge.
- Number of loops on hook equals number of sts for row counting after Return Pass.
- The blanket is worked flat with RS always facing from bottom up and left to right in columns of squares.
Instructions
Tunisian crochet throw
With A, ch 146.
Row 1 FP: Insert the hook in the back bump of second ch from hook, yrh and pul, * insert the hook in the back bump of the next ch, yrh and pul following colourwork chart (R 1); rep from * across. 146 lps on hook.
Row 1 RP and all other RPs: Standard RP.
Rows 2-8: Continue working colourwork chart, tss in each st across to last st, ES in last st.
Row 9: Tss in each st across following colourwork chart (R1) to last st, ES in last st.
Rows 10-16: Rep Rows 2-8.
Rows 17-120: Rep Rows 9-16.
Row 121: In A, Tss bind-off.
Fasten-off.
Finishing:
Weave in all ends and block to final measurements.
I would love to see and share your work on social media, use #melissathrow or #exquisitecrochetuk.
Pattern support: exquisite.crochet.uk@gmail.com
Further resources:
Pattern video tutorial:
For endless crochet inspiration, you can subscribe to AllFreeCrochet website here.
If you prefer to have all your craft inspiration in one place, FaveCrafts is definitely the place to go. Why not subscribe to their newsletter here so you would not miss a thing!
You can purchase the add free PDF version of the pattern at LoveCrafts here and Ravelry here.
You can get your Brava Worsted here.
Did you enjoy the Melissa Throw pattern? Why not try my other Tunisian crochet throw patterns:


Do you enjoy knitting too? No problem! You may enjoy this pattern :-):
Thank you so much if you got this far in the pattern! I hope you got inspired for your own version using various colours. I can’t wait to see it! Don’t forget to tag me on Instagram and let me know in the comment section below how you got on with it! As always, if you have any pattern query, the quickest way to get it answered is by emailing me on the pattern support email address above.
Happy crocheting!
Pin it to your Pinterest boards for inspiration!

One thought on “Melissa Throw”
Comments are closed.