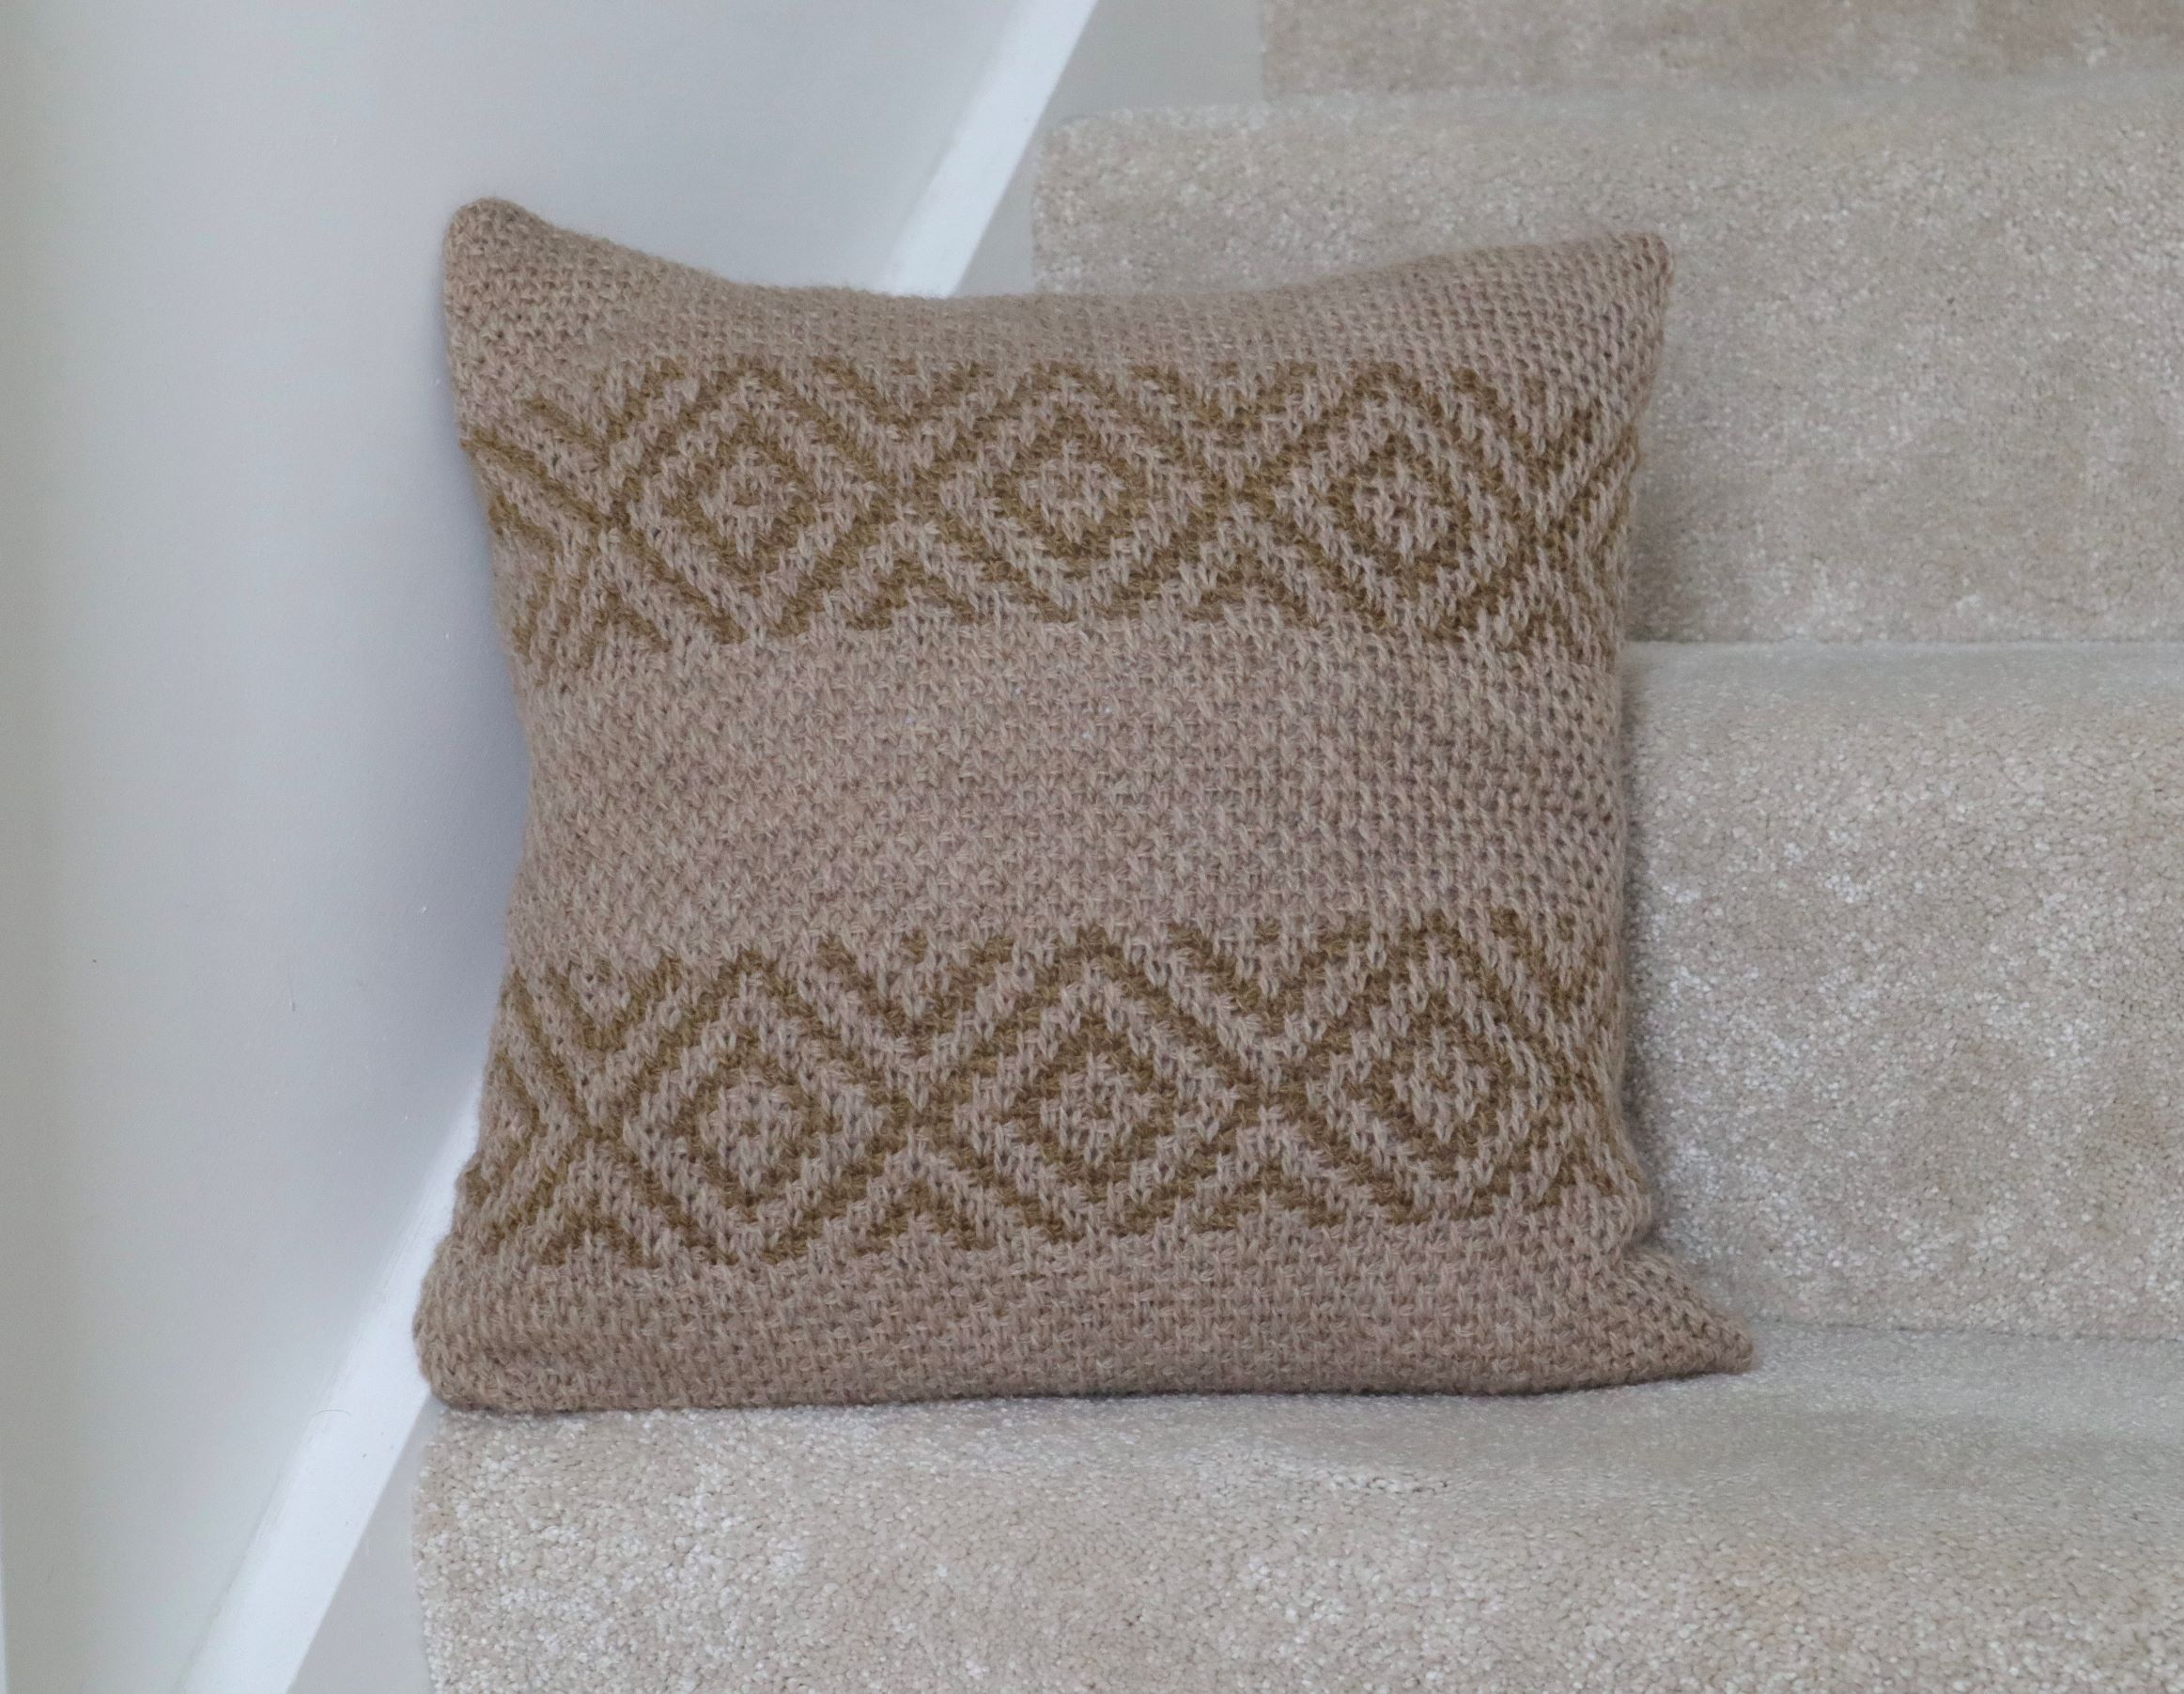
The Mellow Pillow is a fantastic project to spice up your living room area without being overbearing. The neutral colours work beautifully together to create a nice and stylish Tunisian crochet cushion.
The crochet cushion is worked in Tunisian crochet in two pieces; front and back panels. The front panel features stranded colourwork sections creating a diamond pattern that is alternated with a plain section. The back panel matches the plain section.
You can purchase the PDF pattern on Ravelry here and WeCrochet here.
This site contains affiliate links to products. We may receive a commission for purchases made through these links at no extra cost to you. This helps to cover the running cost of the website and enables me to continue making free patterns.
Please NOTE that this pattern is subject to copyright and is my intellectual property. The online version is for personal use only. Do not re-publish or sell this pattern in part or full or make video tutorials of it. Any such actions are a breach of copyright and can result in legal action.

Finished Measurements:
The final Tunisian crochet cushion measurements (blocked):
15 x 15” (38 x 38 cm)
Yarn:
To get the exact look as on the pictures of my Tunisian crochet cushion, you will need:
Palette (Fingering weight, 100% Peruvian Highland Wool, 231 yds (211 m)/1.7 oz (50g)):
Coriander Heather 25544 (A), 3 balls
Camel Heather 24241 (B), 1 ball
You can purchase the yarn for this project here.
Hooks:
US F/5 (3.75mm) Tunisian crochet hook with 10” cable or size needed to obtain gauge
Notions:
Yarn Needle
Scissors
16 x 16” (40 x 40 cm) pillow insert
13” zip (33 cm)
Gauge:
20 sts and 16 rows = 4” over TSS, TKS st pattern, unblocked
Gauge helps you to understand how the project turns out in terms of the final size. If you would like to achieve the exact size of the final project as in the instructions above, you gauge needs to match exactly to the above.
If you get more stitches and/or rows than stated above using the exact hook size as per instructions, your final project will turn out smaller. Conversely, if you get less stitches and/or rows than stated above using the exact hooks size as per instructions, your final project will turn out bigger.
To make adjustments, if you get more stitches and/or rows, you can try using bigger hook size to get closer to the desired size. Conversely, if you get less stitches and/or rows, you can try using smaller hook size to get closer to the desired size.
It may take trial and error to try out a few hook sizes to achieve the exact size.
Alternatively, if you really don’t want to make several samples to achieve the desired size, you can try to alter your tension as you work the project. However, I would advise to try this out once you master the basics of Tunisian crochet as it may be a bit tiresome to try to master the basics of Tunisian crochet and focus on alternating your tension while working the project.

Pattern Notes:
Stitch count refers to the number of sts at the end of FwP unless otherwise stated.
The chart is worked flat.
All finishing seaming is done using the Locking Mattress Stitch.
Front and back panels are worked flat, seamed and zip is added at the end.
Special Stitches:
Tunisian Simple Stitch (TSS)
Insert hook from right to left under front vertical bar of the next st, YO, pull up a lp.
Tunisian Knit Stitch (TKS)
Insert hook from front to back between front and back vertical bar of next st, YO, pull up a lp.
End Stitch (ES)
Rotate end of fabric towards yourself, insert the hook under both bars (left and right) of last st from right to left, YO, pull up a lp.
Special Bind-off
*Insert hook from right to left under front vertical bar of next st, YO, pull up a lp and draw through lp on hook (1 lp rem on hook); rep from * across.
Locking Mattress Stitch
Place panels RS together aligned side by side, sts will be worked through the outer lps of each edge. Thread yarn through the yarn needle and start the seam on one side by inserting needle from left to right through first sts of both panels at bottom. *Move 1 st up on right side, insert needle from right to left and continue to first st on left side (the one already worked into), move 1 st up on left side, insert needle from left to right to last st worked into on the right side; rep from * to end. Continue working one side, top edge and the other side leaving the bottom edge unsewn except for 1” (2.5 cm) sections at each side. Weave in ends.

You can purchase the PDF pattern on Ravelry here and WeCrochet here.
Do you enjoy making crochet home decor? Why not try my other home decor patterns: