You can purchase the add free PDF version of the pattern at LoveCrafts here and Ravelry here.
This site contains affiliate links to products. We may receive a commission for purchases made through these links at no extra cost to you. This helps to cover the running cost of the website and enables me to continue making free patterns.
Please NOTE that this pattern is subject to copyright and is my intelectual property. The online version is for personal use only. Do not re-publish or sell this pattern in part or full, or make video tutorials of it. Any such actions are a breach of copyright and can result in legal action.

Skills required
Chain, Tunisian crochet technique (alternating forward and backward passes), Tunisian simple stitch (tss), Tunisian slip 1 (tsl 1), changing colours on return pass, Tunisian simple stitch bind off, blocking, locking mattress stitch, adding a zip.
Skill level

Finished measurements
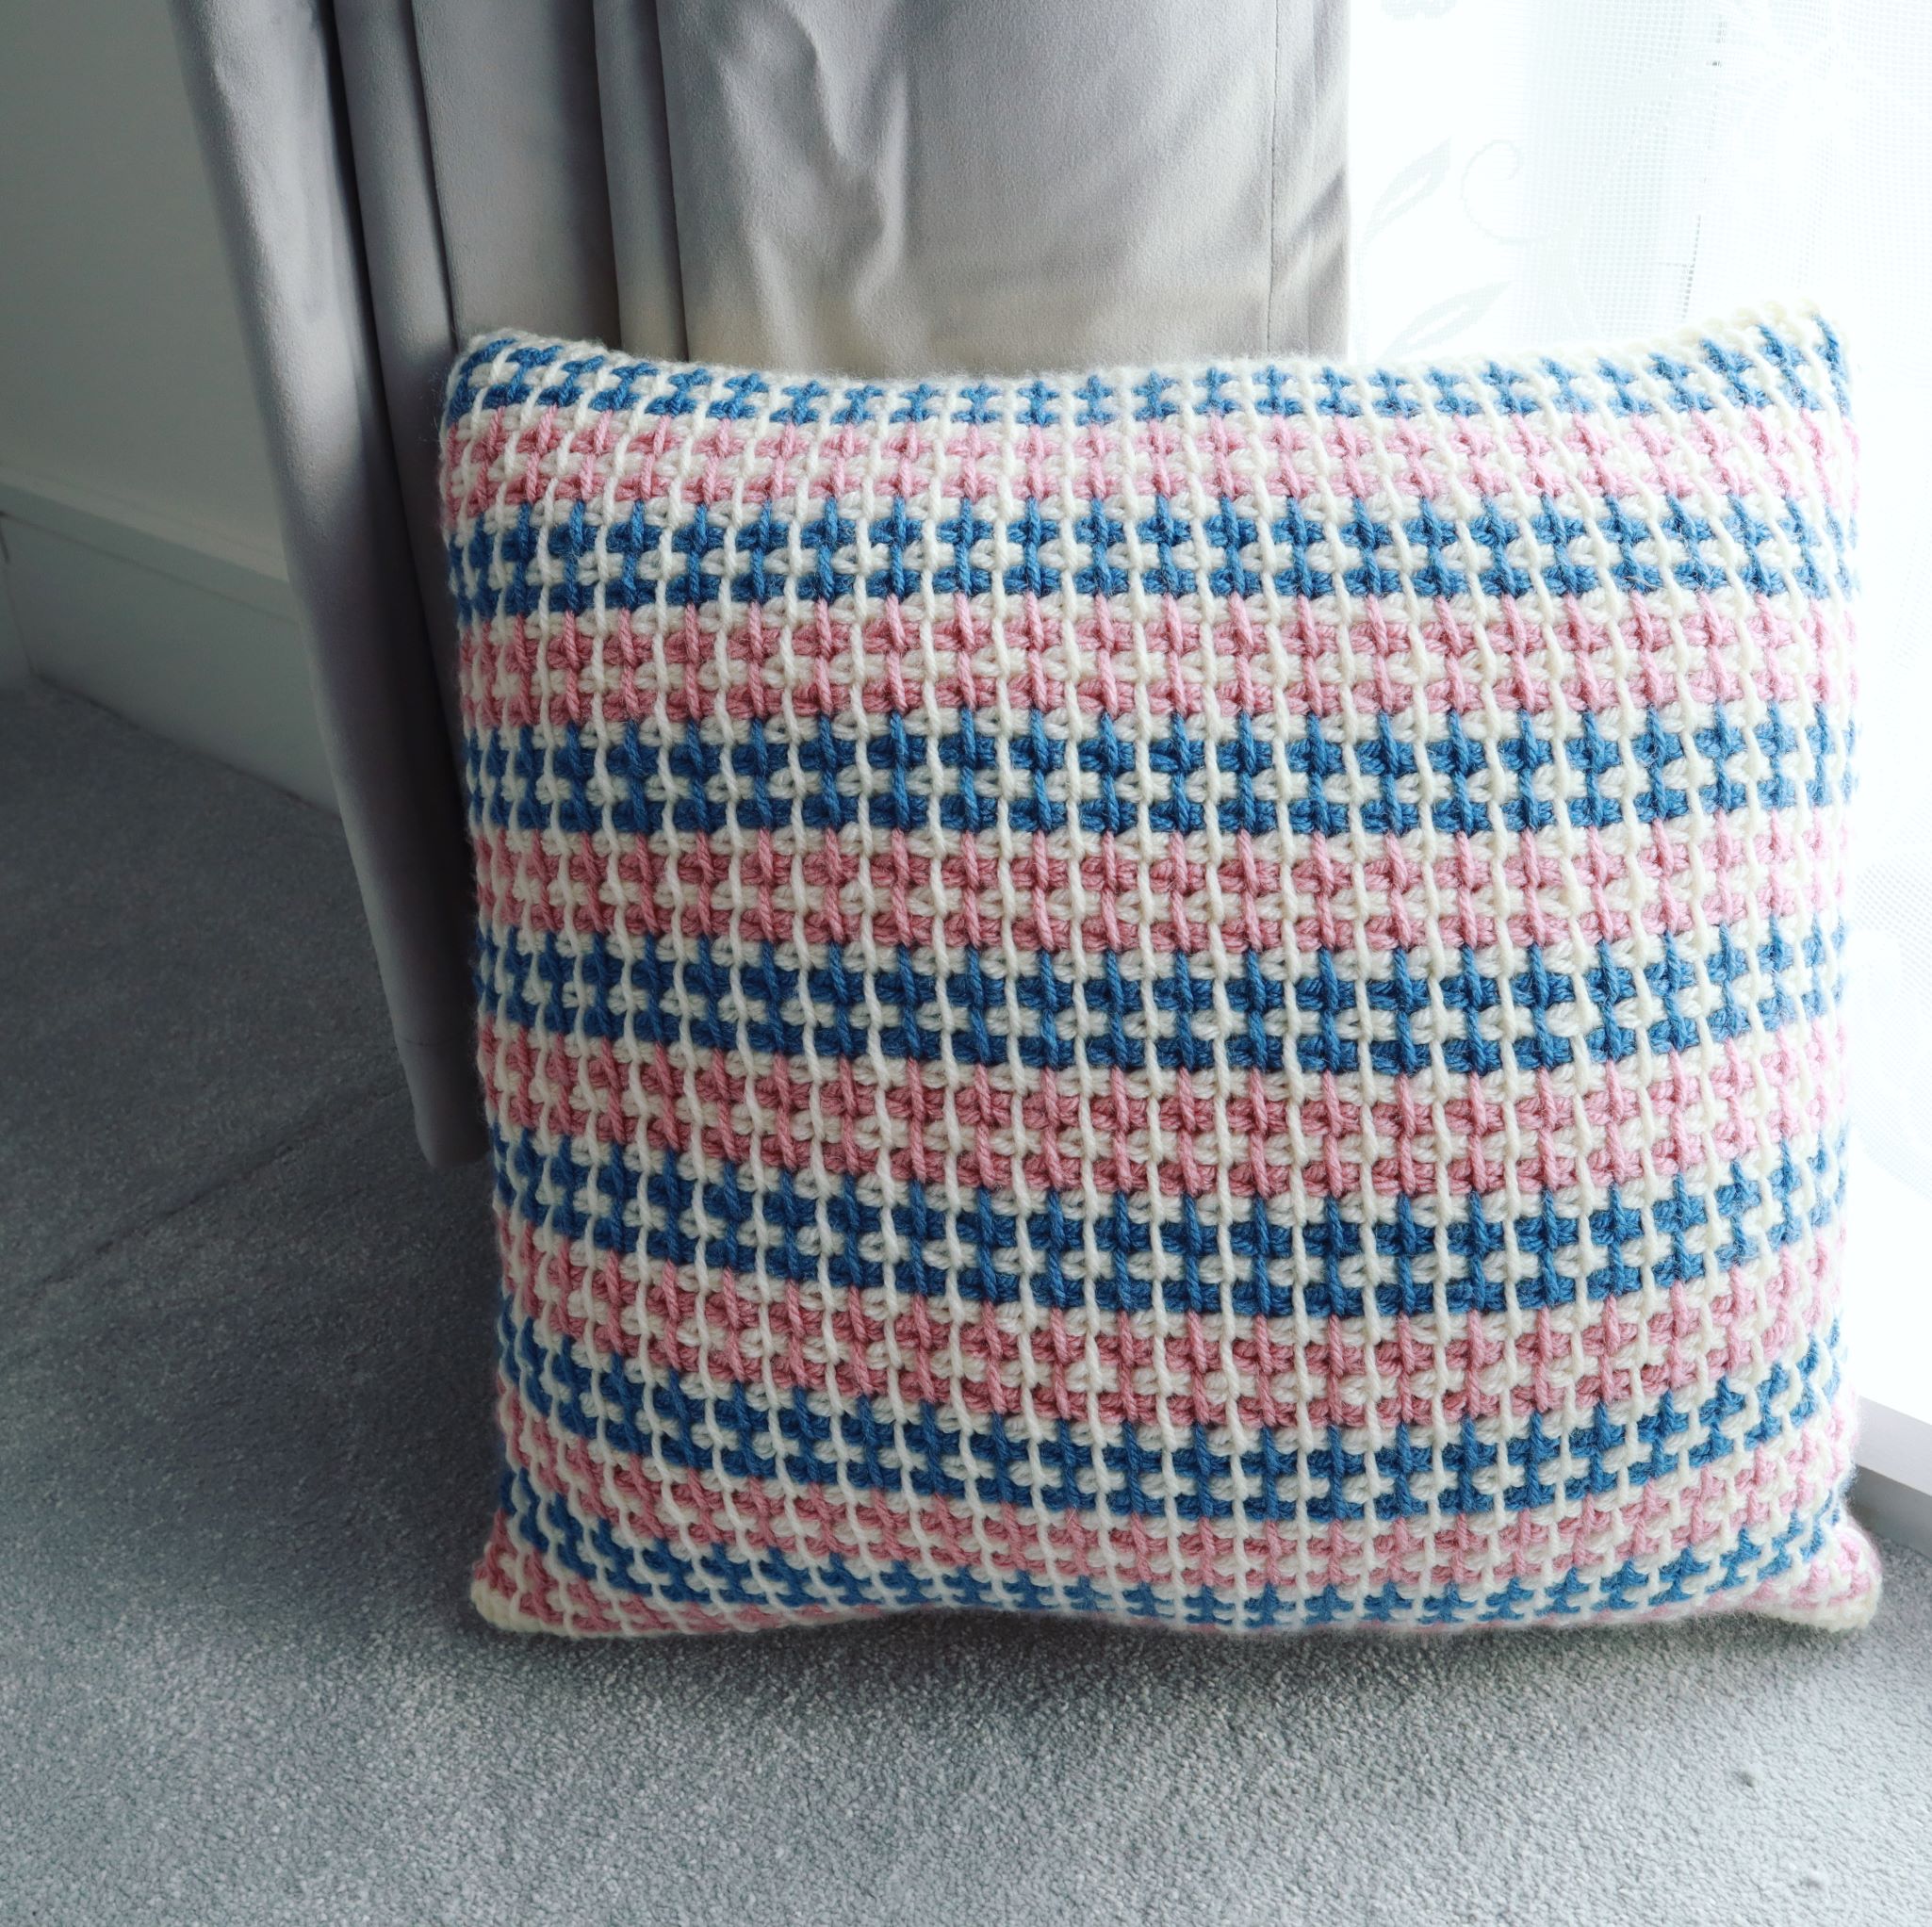
The final cushion measurements (blocked):
41 cm x 41 cm (approx. 16 x 16 in)
Materials and tools
Stylecraft Special Chunky (100% Acrylic, | Bulky | 100 g (3.5 oz) = 144 m (157 yds)), Cream (#1005) (A) 2 skeins, Pale Rose (#1080) (B) 1 skein, Denim (#1302) (C) 1 skein

Tunisian crochet hook size 7 mm with cable (at least 40 cm (16 in)) or size to obtain the gauge
43 x 43 cm (17 x 17 in) pillow form
35.5 cm (14 in) zip
Thread matching A
Sewing needle
Tapestry needle
Scissors
You can get your crochet supplies here.
Gauge
Blocked Gauge:
13 sts x 8 rows = 10 x 10 cm (4 x 4)” over st pattern
Stitch guide
Tunisian crochet stitches are worked in forward and return pass from right to left, with the number of sts (lps) increasing on the hook during the FP and decreasing during the RP.
Return pass is worked in the same way for all sts (rows of sts) used in this project as follows: 1 ch, *yrh, draw through 2 lps on hook, rep from * until 1 lp on hook.
Edge stitches:
Right edge stitch- This is the first st and is not usually worked into because there is one lp on the hook left after completing the RP of the previous row. This one lp corresponds to the first st of the new row.
Left edge stitch- This st is referred to in the pattern as the End Stitch (ES) and is crocheted as follows: Rotate the end of the fabric towards yourself, insert the hook under both bars (left and right) of the last st, yrh and pul.
- First row of Tunisian crochet: Insert the hook in the back bump of second ch from hook, yrh and pul across. Standard return pass.
- Tunisian simple stitch: Insert the hook from right to left under front vertical bar of the next st, yrh and pul. Standard return pass.
- Tunisian slip 1: Insert hook from right to left under front vertical bar of the next st.
Tunisian simple stitch bind off: Insert hook from right to left under front vertical bar of the next st, yrh, pul and pull through the loop that is on the hook. One loop remains on the hook.
Changing colours on return pass: The new colour is added when completing the RP and 2 lps are left on the hook. Yrh with the new colour and draw through 2 loops (1 loop on hook).
| Abbreviations: | |
| ch- chain | yrh- yarn round the hook |
| st(s)- stitch(es) | pul- pull up a loop |
| lp(s)- loop(s) | FP- forward pass |
| tss- Tunisian simple stitch | RP- return pass |
| tsl 1- Tunisian slip 1 | approx.- approximately |
| ES- End stitch | rep- repeat |
| RS- right side | |
Notes
The Modwen Cushion is worked flat, RS facing from right to left and assembled using the Locking Mattress.
The colours are alternated as follows: 2 rows in A, followed by 2 rows in B, 2 rows in A and 2 rows in C.
The stitch count refers to the number of lps on hook on FP.

Instructions
Cushion cover (make 2)
With A, chain 54.
Row 1 FP: Insert the hook in the back bump of second ch from hook, yrh and pul across. 54 lps on hook.
Row 1 RP and all other RPs: Standard RP.
Row 2 FP: Tss across to last st, ES.
Row 2 RP: Standard RP to last 2 lps on hook, change to B, yrh and draw through 2 lps.
Row 3 FP: *Tsl 1, tss; rep from * to last st, ES.
Row 3 RP: Standard RP to last 2 lps on hook, change to A, yrh and draw through 2 lps.
Row 4 FP: *Tss, tsl 1; rep from * to last st, ES.
Row 4 RP: Standard RP to last 2 lps on hook, change to B, yrh and draw through 2 lps.
Row 5: Rep Row 3.
Row 6 FP: Rep Row 4.
Row 6 RP: Standard RP to last 2 lps on hook, change to C, yrh and draw through 2 lps.
Row 7: Rep Row 3.
Row 8: Rep Row 6.
Row 9: Rep Row 3.
Row 10: Rep Row 4.
Rows 11-50: Rep Rows 3-10.
Rows 51-57: Rep Rows 3-9.
Row 58 FP: *Tss, tsl 1; rep from * to last st, ES.
Row 58 RP: Standard RP.
Row 59: Tss across to last st, ES.
Row 59 RP: Standard RP.
Row 60: Bind off.
Fasten off.
Finishing
Weave in ends and block to final measurements.
Place both pieces RS together flat. Join both sides (left and right), top edge and 2.5 cm (1 in) of bottom edge on both sides using Locking Mattress Stitch. Sew zip into the 35. 5 cm (14 in) opening at the bottom edge. Insert pillow form.
Special techniques
Locking Mattress Stitch
- Place the pieces RS down with edges aligned side by side. Stitches will be worked through the bottom lps of each edge.
- Start the seam by inserting the needle from left to right through the first stitches of both panels at the bottom.
- Move one stitch up on the right side, insert the needle from right to left and continue to the first stitch on the left side (the one already worked into).
- Move one stitch up on the left side, insert the needle from left to right and continue to the last stitch worked into on the right side.
- Repeat steps 3 and 4 to end.
- Weave in ends.
I would love to see and share your work on social media, use #modwencushion or #equisitecrochetuk
Pattern support: exquisite.crochet.uk@gmail.com
Further resources
Pattern video tutorial:
For endless crochet inspiration, you can subscribe to AllFreeCrochet website here.
If you prefer to have all your craft inspiration in one place, FaveCrafts is definitely the place to go. Why not subscribe to their newsletter here so you would not miss a thing!
Did you enjoy the Modwen cushion pattern? Why not try my other home decor patterns:


5 thoughts on “Modwen Cushion”
Comments are closed.