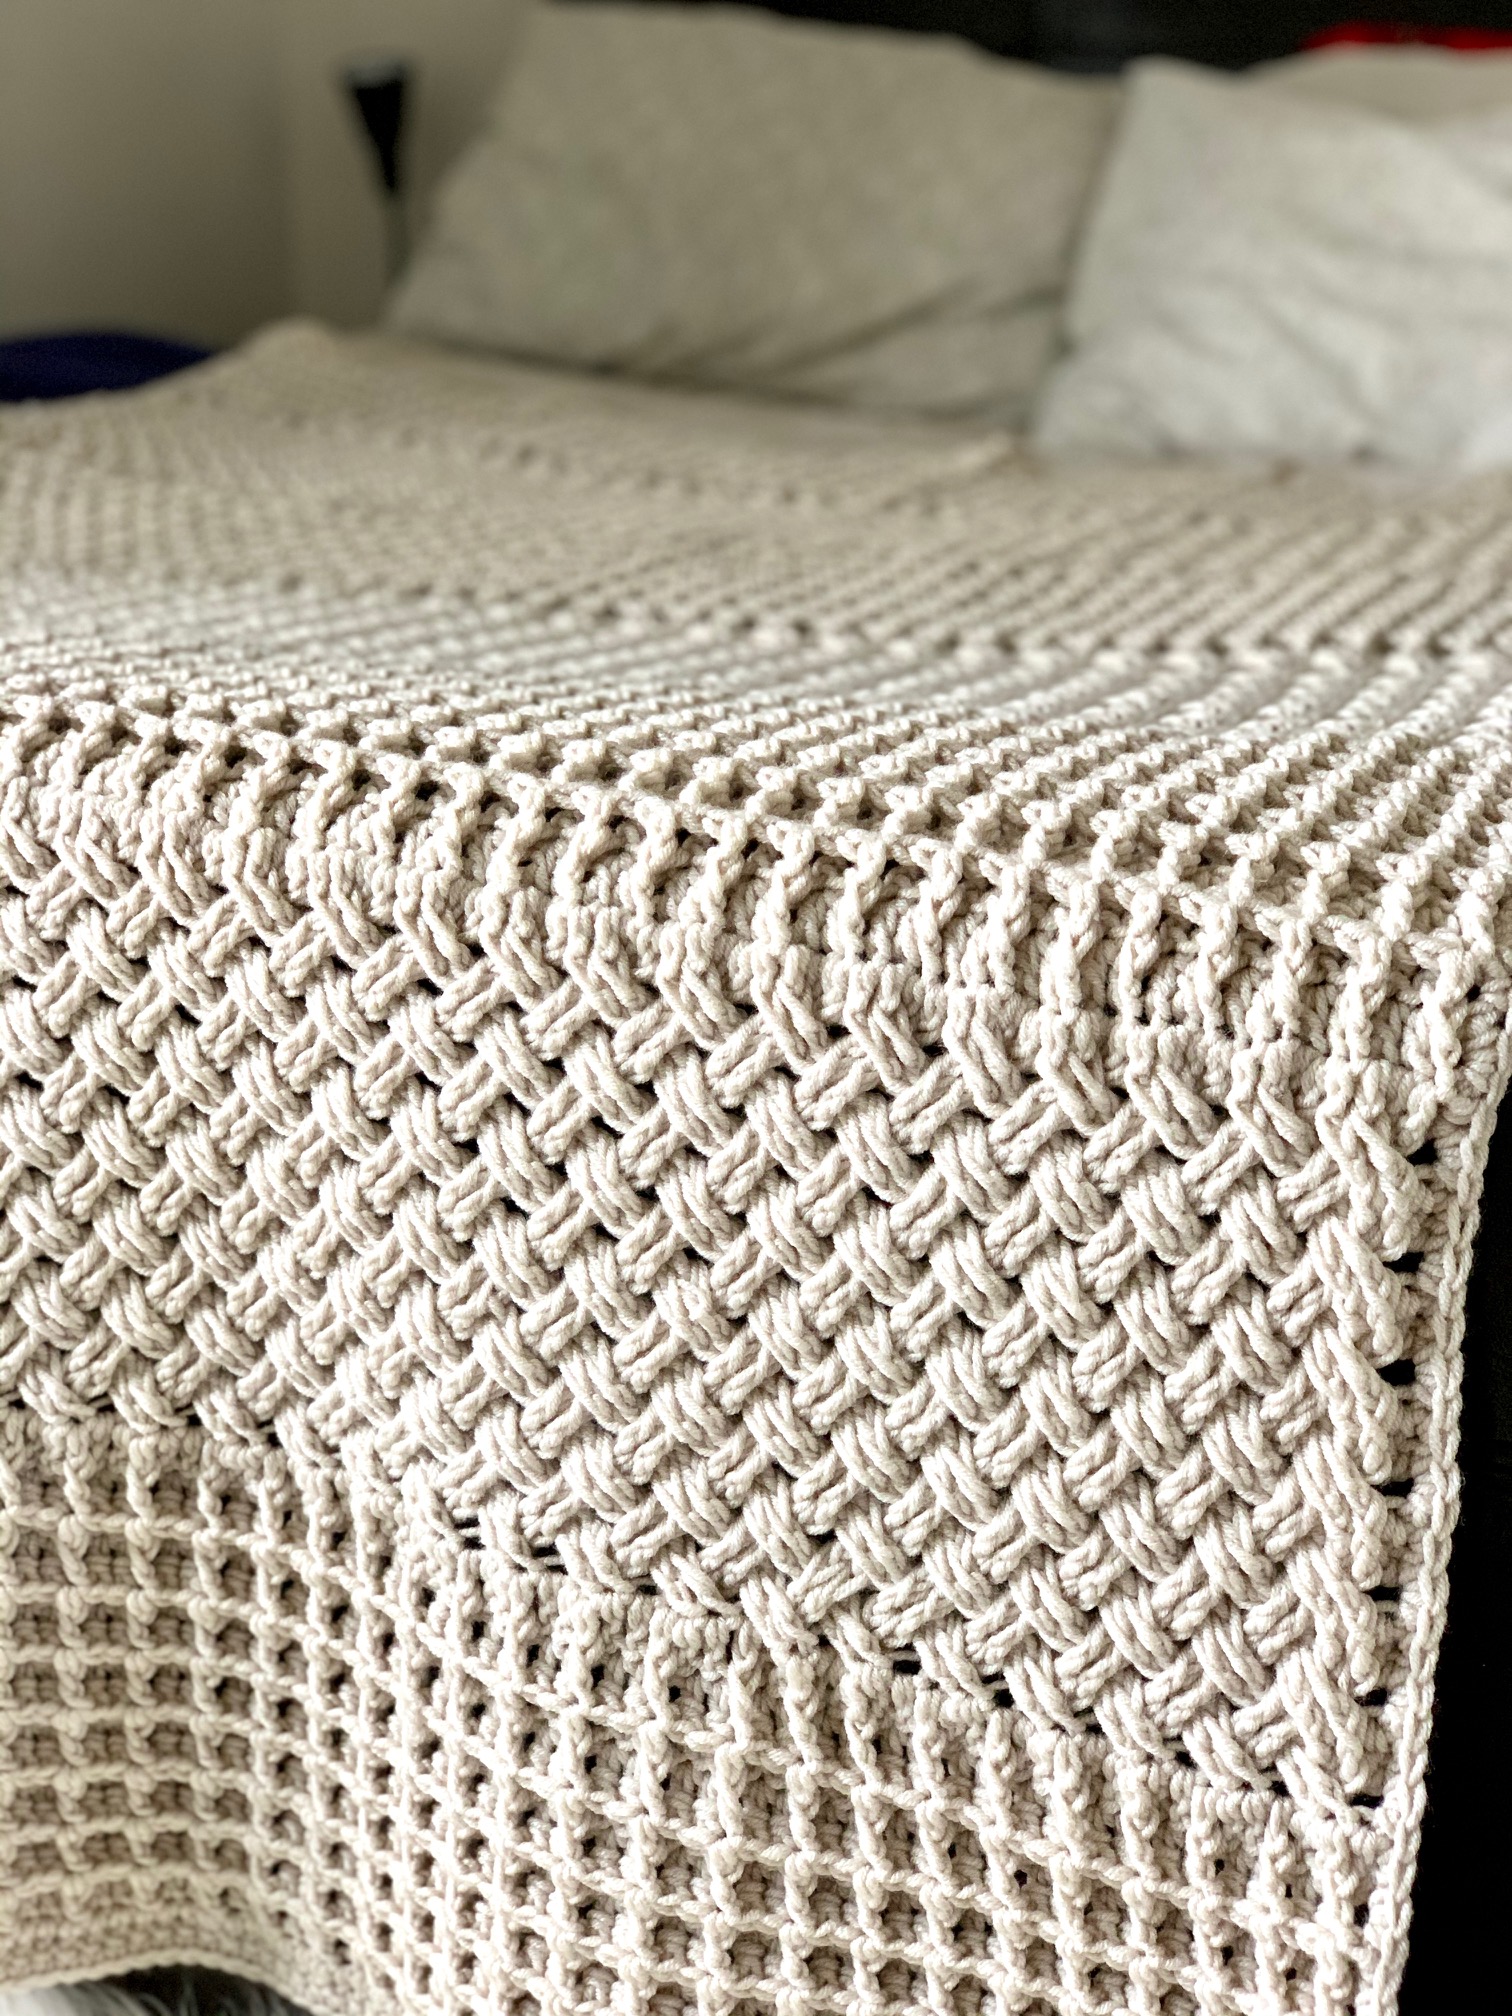
This textured crochet throw was inspired by freshly snowed on fields and different marks that can be found on such blank canvas, be it regular pattern of shoes soles, car tires or strange and wonderful animal marks.
The yarn gives off slight sheen reminiscent of freshly snowed on fields reflecting the morning winter sun.
The pattern was published in Happily Hooked Magazine in Dec 2020, issue Winter Wonderland.
last updated 24/02/2024
You can purchase the add free PDF version of the pattern at LoveCrafts here and Ravelry here.
This site contains affiliate links to products. We may receive a commission for purchases made through these links at no extra cost to you. This helps to cover the running cost of the website and enables me to continue making free patterns.
Please NOTE that this pattern is subject to copyright and is my intellectual property. The online version is for personal use only. Do not re-publish or sell this pattern in part or full or make video tutorials of it. Any such actions are a breach of copyright and can result in legal action.

Skills required:
To create this beautiful textured crochet throw you will need to master (or already know) these stitches and techniques:
Chain, single crochet (sc), double crochet (dc), foundation double crochet stitch (fdc), front post double crochet (fpdc), back post double crochet (bpdc), adding pompom, blocking.
Skill level:

Finished measurements:
The final textured crochet throw measurements (blocked):
118 cm wide x 150 cm long (approximately 46.5 x 59 in)
Materials and tools:
To get the exact look as on the pictures of my textured crochet throw, you will need:
Stylecraft Bellissima Chunky (100% Acrylic | bulky | 100 g (3.5 oz) = 145 m (158 yds)), Paper Parchment (#3973) 19 skeins

Crochet hook size 6.0 mm (J/10) or size to obtain the gauge
Pompom maker (Clover size blue) or 8 cm (3 in) wide piece of cardboard
Tapestry needle
Scissors
You can get your craft supplies here.
Gauge:
Blocked Gauge:
12 sts x 8 rows = 10 x 10 cm (4 x 4)” over Celtic weave st pattern
12 sts x 7 rows = 10 x 10 cm (4 x 4)” over Waffle st pattern

Stitch guide:
fdc (foundation double crochet) = ch 2, yrh, insert hook in 2nd ch from hook, yrh, pull up lp, yrh, pull through 1 lp on hook (ch 1 made), [yrh, pull through 2 lps on hook] twice (dc made), *yrh, insert hook in ch 1 made, yrh, pull up a lp, yo, pull through 1 lp on hook (ch 1 made), [yrh, pull through 2 lps on hook] twice; rep from * for indicated number of sts.
fpdc (front post double crochet) = yrh, insert hook from front to back and to front around the vertical post of next st, yrh, pull up a lp, [yrh, pull through 2 lps on hook] twice.
bpdc (back post double crochet) = yrh, insert hook from back to front and to back around the vertical post of next st, yrh, pull up a lp, [yrh, pull through 2 lps on hook] twice.
Notes:
Similar bulky weight yarns may be substituted; please check gauge.
Beginning ch 2 does NOT count as stitch in Celtic weave st pattern.
Beginning ch 2 DOES count as stitch in Waffle st pattern.
Pompoms are added in each corner of the textured crochet throw at the end.

Instructions:
Textured Crochet Throw
Row 1 (WS): Fdc138 – 138 sts.
Row 2 (RS): Ch 2 (counts as 1st dc in Waffle st pattern), fpdc in next st, *dc in next 2 sts, fpdc in next st; repeat from * to last st, dc in last st, turn.
Row 3: Ch 2, dc in next st, *fpdc in next 2 sts, dc in next st; repeat from * to last st, dc in last st, turn.
Rows 4-15: Repeat Rows 2-3.
Row 16: Repeat Row 2.
Row 17: Ch 2 (counts as 1st dc), dc in each st across, turn.
Row 18: Ch 2 (does NOT counts as 1st dc in Celtic weave st pattern), dc in 1stst, *skip 2 sts, fpdc in next 2 sts, fpdc in skipped 2 sts and worked in front of previous 2 sts; repeat from * to last st, dc in last st, turn.
Row 19: Ch 2, dc in 1st st, bpdc in next 2 sts, *skip 2 sts, bpdc in next 2 sts, bpdc in skipped 2 sts and worked behind of previous 2 sts; repeat from * to last 3 sts, bpdc in next 2 sts, dc in last sts, turn.
Rows 20-29: Repeat Rows 18-19.
Row 30: Repeat Row 18.
Row 31: Repeat Row 17.
Rows 32-91: Repeat Rows 2-31.
Rows 92-107: Repeat Rows 2-17.
Border
Sc evenly around edge placing 3 sc in each corner.
Fasten off, weave in ends.
Pompoms (make 4)
With 8 cm (3 in) pompom maker or piece of carboard make pompom, tie with thread. Use thread ends to secure 1 pompom to each corner.
Finishing:
Weave in ends and block to final measurements as above.
I would love to see and share your work on social media, use #marksinthesnowthrow or #exquisitecrochetuk
Pattern support: exquisite.crochet.uk@gmail.com
| Abbreviations: | |
| Ch- chain | yrh- yarn round the hook |
| st(s)- stitch(es) | lp(s)- loop(s) |
| sc- single crochet stitch | pul- pull up a loop |
| fdc- foundation double crochet | RS- right side |
| rep- repeat | WS- wrong side |
| fpdc- front post double crochet | approx.- approximately |
| bpdc- back post double crochet | |
Further resources:
The Marks in the Snow Throw video tutorial:
For endless crochet inspiration, you can subscribe to AllFreeCrochet website here and AllFreeCrochetAfghanPatterns here.
If you prefer to have all your craft inspiration in one place, FaveCrafts is definitely the place to go. Why not subscribe to their newsletter here so you would not miss a thing!
Did you enjoy the Marks in the snow throw pattern? Why not try my other home decor patterns:
Moon and Stars Tunisian Crochet Blanket


Thank you so much! Beautiful pattern and blanket!
Thank you😊
Beautiful pattern. Thank you for sharing!!
Thank you Pam!
How would I make this a bigger blanket? What are the multiples for stitches please?
The pattern is 4+2 sts. Hope this helps😊.
Thank you so much!
What an exquisite pattern! Thank you for making it available to all who wish to make it. I would love to have the expertise to complete such a lovely blanket and would love to have a go one day.